
This comprehensive guide will walk you through everything you need to know about hydroponic gardening. You’ll discover what makes this growing method different from traditional gardening, explore the systems that work best for beginners, and learn exactly what equipment you need to get started. By the end, you’ll have the confidence to set up your first hydroponic garden and start growing fresh food in water rather than soil.
Understanding Hydroponic Gardening
Hydroponic gardening is a method of growing plants in water enriched with nutrients, without using soil. The word “hydroponics” comes from the Greek words “hydro” (water) and “ponos” (labor), literally meaning “water working.” In this system, plant roots absorb nutrients directly from the water solution, allowing for faster growth and higher yields than traditional soil-based gardening.
How Hydroponics Differs from Traditional Gardening
In conventional gardening, soil serves multiple purposes: it anchors plant roots, stores nutrients and water, and provides a growing medium for beneficial microorganisms. Hydroponic systems replace these functions through careful design. Plants are supported by inert growing media like perlite or coconut coir, while carefully balanced nutrient solutions deliver everything plants need directly to their roots.
The absence of soil eliminates many common gardening challenges. You won’t deal with soil-borne diseases, weeds, or the need to amend and test soil regularly. Instead, you maintain control over the exact nutrients your plants receive, adjusting the solution to meet specific crop requirements.
The Science Behind Water-Based Growing
Plants don’t actually need soil to grow—they need the nutrients, water, and oxygen that soil provides. In hydroponic systems, these essentials are delivered more efficiently. Roots suspended in oxygenated nutrient solution can absorb what they need without expending energy to search through soil. This direct access to nutrients and oxygen explains why hydroponically grown plants often develop faster and produce more abundant harvests.
The key to successful hydroponics lies in maintaining the right balance of nutrients, pH levels, and oxygen in the water. When properly managed, these systems create ideal growing conditions that would be difficult to achieve consistently in traditional gardens.

Start Your Hydroponic Journey with Confidence
Get our free Beginner’s Hydroponic Setup Checklist and avoid common mistakes when starting your first system.
Benefits and Challenges of Hydroponic Systems
Before investing time and money into a hydroponic garden, you should understand both the advantages and potential challenges. Hydroponics offers compelling benefits for home growers, but it’s not without considerations that may affect your decision.
Advantages of Hydroponic Gardening
- Faster plant growth rates compared to soil gardening, often 30-50% quicker
- Higher yields from the same space due to optimized growing conditions
- Reduced water usage—up to 90% less water than traditional gardening through recirculation
- Year-round growing capability regardless of outdoor weather conditions
- No weeding required, saving hours of maintenance time
- Minimal pest and disease issues, especially with indoor systems
- Precise control over nutrient delivery and pH levels
- Ability to grow in areas with poor soil quality or limited outdoor space
- Cleaner harvests without soil contamination
- Better space efficiency with vertical growing options
Challenges to Consider
- Initial setup costs higher than traditional gardens ($100-$500 for basic systems)
- Requires electricity for pumps and lights, adding to operating costs
- Learning curve for managing pH levels and nutrient concentrations
- System failures can damage crops quickly if pumps malfunction
- Regular monitoring needed—checking systems every 2-3 days minimum
- Water quality matters significantly, may need filtration
- Limited crop options—root vegetables like carrots and potatoes don’t work well
- Dependent on proper equipment function and power supply
- Initial time investment to understand system management
Cost Reality Check: While hydroponic systems require more upfront investment than traditional gardens, they often pay for themselves within one growing season through higher yields and the ability to grow expensive herbs and vegetables year-round. A basic lettuce system can cost under $100 to build, while a more sophisticated tomato setup might run $300-500.
Who Should Consider Hydroponics?
Hydroponic gardening makes excellent sense for specific situations and gardening goals. Urban dwellers with limited outdoor space find hydroponics ideal for growing fresh produce on balconies, patios, or even indoors. If you live in an area with poor soil quality, extreme weather conditions, or short growing seasons, hydroponics overcomes these environmental limitations.
This growing method also appeals to gardeners who enjoy technology and don’t mind a learning curve. If you appreciate the science behind plant growth and like optimizing systems, you’ll find hydroponics engaging. However, if you prefer a more hands-off approach to gardening or want to grow a wide variety of root crops, traditional soil gardening might suit you better.

Types of Hydroponic Systems for Beginners
Choosing your first hydroponic system can feel overwhelming with so many options available. Each system type operates differently and suits particular crops and experience levels. Understanding these differences helps you select the right system for your space, budget, and growing goals.
Deep Water Culture (DWC) – The Simplest Starting Point
Deep water culture represents the most straightforward hydroponic system for beginners. Plants sit in net pots suspended above a reservoir of nutrient solution, with roots dangling directly into the oxygenated water. An air pump and air stone continuously bubble oxygen through the water, preventing root rot and promoting healthy growth.
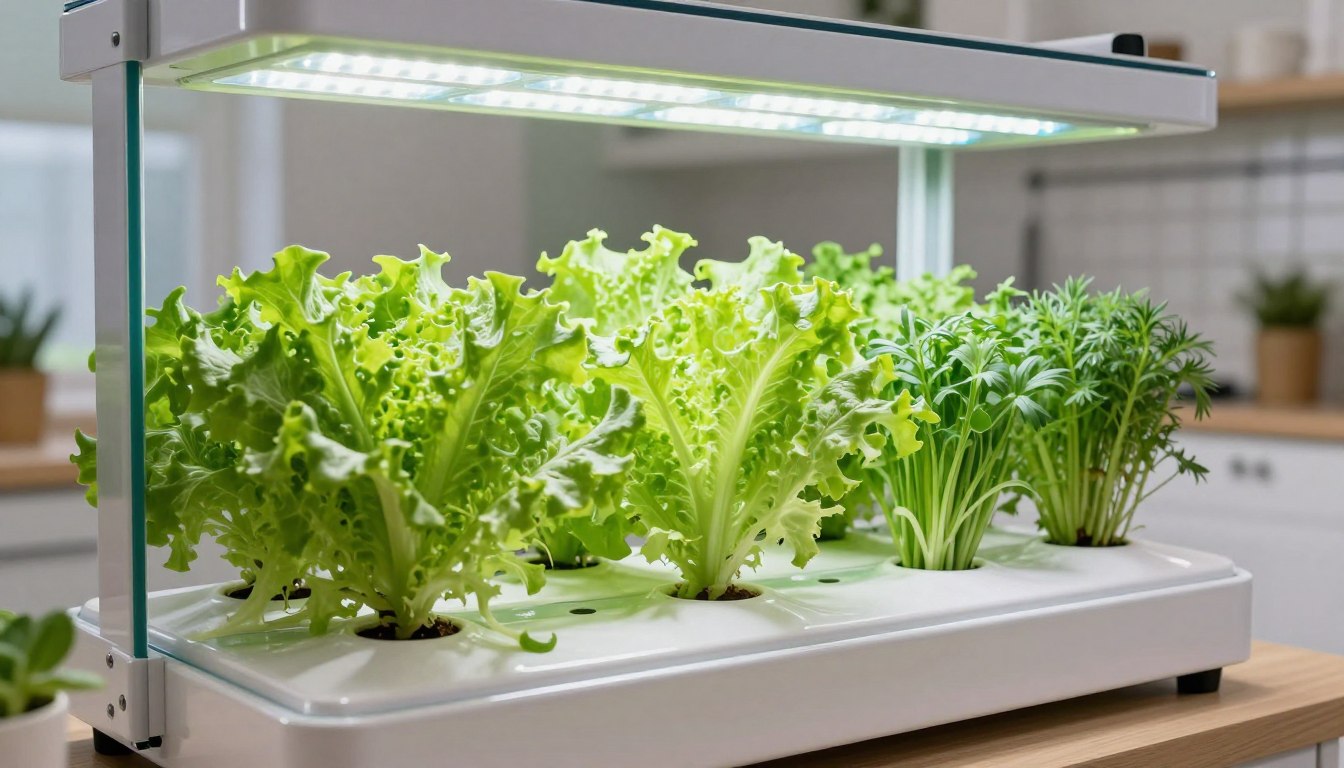
This system works exceptionally well for lettuce, herbs, and other leafy greens. The minimal equipment requirements—a container, net pots, growing medium, air pump, and nutrients—make DWC systems affordable and easy to maintain. Many beginners build their first DWC system for under $50 using basic materials from hardware stores.
The main limitation of deep water culture involves plant size and growing duration. Large plants like tomatoes become too heavy for the net pots, and long-season crops require more frequent water changes. However, for quick-growing leafy crops, DWC delivers impressive results with minimal complexity.
DWC System Best For:
- Absolute beginners to hydroponics
- Lettuce and salad greens
- Fresh herbs like basil and cilantro
- Small spaces and limited budgets
- Learning basic hydroponic principles
Nutrient Film Technique (NFT) – Continuous Flow Systems
Nutrient film technique systems pump a thin film of nutrient solution through sloped channels or tubes where plant roots absorb what they need. The solution continuously flows, collecting at the end of the channel before returning to the reservoir for recirculation. This constant movement keeps the nutrient solution oxygenated and fresh.
NFT systems excel at growing lightweight, fast-maturing crops like lettuce, spinach, and strawberries. The continuous flow ensures roots never dry out while maintaining excellent oxygen exposure. Commercial growers favor NFT for its efficiency and scalability, but home gardeners can build small versions using PVC pipes or rain gutters.

The main challenge with NFT involves the dependence on continuous pump operation. If the pump fails or power goes out, plant roots dry out quickly in the exposed channels. This system requires reliable equipment and careful monitoring, making it better suited for gardeners who’ve gained some hydroponic experience with simpler systems first.
Ebb and Flow (Flood and Drain) – Versatile Growing
Ebb and flow systems periodically flood a growing tray with nutrient solution before draining it back to the reservoir. A timer controls the pump, typically flooding the tray for 15-30 minutes every few hours. Between flooding cycles, plant roots get excellent oxygen exposure as they sit in the damp growing medium.
Timing Tips: Most ebb and flow systems run 3-4 flood cycles daily for mature plants. Seedlings need more frequent flooding (every 2-3 hours), while established plants with extensive root systems can manage with just 2-3 floods per day. Adjust timing based on plant size, growing medium, and ambient temperature.
This system’s versatility makes it popular among intermediate hydroponic gardeners. You can grow a wide variety of crops in ebb and flow systems, from lettuce and herbs to peppers and tomatoes. The periodic flooding gives you more flexibility than systems requiring continuous operation, and the growing medium retains some moisture during drain periods, providing a buffer if equipment malfunctions.
Building an ebb and flow system requires more components than DWC—including a flood tray, reservoir, pump, timer, overflow fitting, and growing medium. However, many gardeners find the investment worthwhile for the system’s reliability and ability to accommodate larger, longer-season crops.
Kratky Method – Passive Hydroponics
The Kratky method stands out as the only truly passive hydroponic system, requiring no pumps, electricity, or moving parts. Plants start in a container filled with nutrient solution just touching the roots. As plants grow and consume water, the solution level drops, creating an air gap where roots access oxygen. The upper roots absorb oxygen from the air while lower roots draw nutrients from the remaining solution.
This ingenious passive system works beautifully for short-season crops like lettuce that mature before consuming all the nutrient solution. Many gardeners use the Kratky method for herbs and leafy greens in small containers, appreciating the zero maintenance and no electricity costs. However, long-season crops like tomatoes typically outgrow the static nutrient reservoir before harvest.
Deep Water Culture
Best for beginners and leafy greens
- Continuous aeration required
- Very simple setup
- Limited to smaller plants
- Low initial cost
Nutrient Film Technique
Ideal for commercial-scale lettuce
- Continuous pump operation
- Highly efficient water use
- Vulnerable to pump failures
- Moderate complexity
Ebb and Flow
Versatile for many crop types
- Periodic flooding cycles
- Works with larger plants
- Buffer against malfunctions
- Higher initial investment
Kratky Method
Perfect for herbs and microgreens
- No pumps or electricity
- Simplest maintenance
- Limited to short crops
- Minimal cost
See Hydroponic Systems in Action
Watch our detailed video tutorial showing how to build three different beginner-friendly systems step-by-step.
Advanced Systems: Dutch Bucket and Drip Systems
As you gain hydroponic experience, you might explore more sophisticated systems designed for larger plants like tomatoes, peppers, and cucumbers. Dutch bucket systems use individual containers filled with growing medium, each with its own drip line supplying nutrient solution. This modular approach lets you grow different crops with varying nutrient requirements in the same system.
Drip systems work similarly, delivering nutrient solution directly to each plant’s root zone through emitters. The excess solution either drains to waste or recirculates back to the reservoir. These systems handle large, heavy plants excellently and allow precise control over feeding schedules. However, they require more equipment, space, and maintenance knowledge than beginner systems.
Essential Equipment and Supplies
Setting up your first hydroponic garden requires specific equipment and supplies. Understanding each component’s purpose helps you make informed purchasing decisions and avoid buying unnecessary items. Let’s explore what you actually need versus what’s optional for beginners.
Containers and Reservoirs
Your hydroponic system needs a container to hold the nutrient solution. For simple DWC systems, a 5-gallon bucket works perfectly for one or two plants. Larger plastic storage totes accommodate multiple plants and provide more water volume, which stabilizes pH and nutrient levels longer. Choose opaque containers to prevent algae growth—light penetration into nutrient solution promotes algae that competes with plants for nutrients and oxygen.
The reservoir size matters for stability and maintenance frequency. Smaller reservoirs require more frequent monitoring and topping off as water evaporates and plants consume nutrients. As a general rule, provide at least 1-2 gallons of nutrient solution per plant for leafy greens, and 2-5 gallons per plant for larger crops like tomatoes.

Net Pots and Growing Media
Net pots are plastic containers with slotted or mesh sides that hold plants while allowing roots to grow through and access nutrient solution. These pots come in various sizes from 2 inches to 6 inches or larger. Smaller pots work for herbs and lettuce, while larger pots support bigger plants like peppers and tomatoes.
Growing media serves as the physical support for plant roots in the net pots. Unlike soil, hydroponic growing media provides no nutrients—it simply anchors plants and maintains some moisture and air around roots. Popular options include:
| Growing Medium | Best For | Pros | Cons | Reusable |
| Clay Pebbles (LECA) | All crops, all systems | Excellent drainage, reusable, pH neutral, easy to work with | Higher cost, can be too light for top-heavy plants | Yes, indefinitely |
| Perlite | Ebb and flow, Dutch buckets | Inexpensive, excellent aeration, lightweight | Dusty, floats easily, breaks down over time | Limited (2-3 cycles) |
| Coconut Coir | Drip systems, larger plants | Excellent water retention, sustainable, organic | Needs pre-rinsing, can harbor pests, variable quality | Limited (1-2 seasons) |
| Rockwool | Starting seeds, NFT systems | Excellent water retention, sterile, consistent quality | Not biodegradable, can irritate skin, needs pH adjustment | No |
| Growstones | All systems, sustainable alternative | Made from recycled glass, pH neutral, good drainage | Can be sharp, higher cost, less widely available | Yes |
Pumps and Aeration Equipment
Most hydroponic systems require pumps to move water or provide aeration. Air pumps with air stones oxygenate the nutrient solution in DWC systems, preventing root rot and promoting healthy growth. Choose an air pump rated for your reservoir size—a standard aquarium pump works fine for 5-10 gallon systems, while larger reservoirs need more powerful pumps.
Water pumps circulate nutrient solution in active systems like NFT, ebb and flow, and drip systems. Submersible pumps sit directly in the reservoir and push solution through tubing to growing areas. Look for pumps rated for continuous operation if your system runs 24/7, or choose models with lower flow rates for systems that cycle on and off.
Backup Power Consideration: Power outages pose serious risks to hydroponic systems, especially NFT and aeroponic setups where roots dry out rapidly. Consider keeping a battery-powered air pump as backup for DWC systems, or plan to hand-water plants temporarily during outages. Some growers invest in small generators or UPS backup systems for peace of mind.
Lighting for Indoor Growing
If you’re growing hydroponically indoors or in low-light locations, supplemental lighting becomes essential. Plants need specific light wavelengths for photosynthesis and healthy growth. While natural sunlight from a south-facing window can work for some herbs and lettuce, most crops require dedicated grow lights for optimal production.
LED grow lights have become the standard for home hydroponic gardening. They consume less electricity than older technologies, run cooler, and provide the full spectrum of light plants need. Full-spectrum LED panels work well for all plant types, while you can choose specialized vegetative or flowering spectrums for specific growth stages.
Consider the coverage area when selecting grow lights. Most LED panels specify their effective coverage at a given mounting height. For leafy greens, you can position lights closer (6-12 inches), while flowering crops like tomatoes need lights 12-24 inches above the canopy. Start with approximately 20-40 watts of actual LED power per square foot of growing area.

pH and EC Testing Equipment
Maintaining proper pH and nutrient concentration separates successful hydroponic gardens from struggling ones. pH levels affect nutrient availability—when pH drifts outside the optimal range of 5.5-6.5, plants can’t absorb certain nutrients even when they’re present in the solution. Electrical conductivity (EC) measures the concentration of dissolved nutrients in the water.
Digital pH meters provide accurate readings and cost between $20-$80 depending on quality. Budget models work fine for beginners, though they may require more frequent calibration. Keep pH calibration solution on hand to ensure accurate readings. For adjusting pH, purchase pH-up (usually potassium hydroxide) and pH-down (usually phosphoric acid) solutions specifically formulated for hydroponics.
EC meters measure nutrient strength, indicating whether your solution is too weak or too concentrated. These meters typically cost $30-$100. Some advanced meters combine pH and EC testing in one device. While you can start with simple test strips for pH, digital meters make monitoring easier and more precise as your hydroponic hobby develops.
Beginner’s Essential Kit
Complete starting package for your first hydroponic garden:
- 5-gallon opaque bucket
- 6-inch net pot lid
- Clay pebbles growing media
- Small air pump with air stone
- Digital pH meter
- pH adjustment solutions
- Liquid hydroponic nutrients
- Growing guide
Estimated Cost: $75-$120
Intermediate Expansion
Ready to grow more varieties and larger plants:
- Large storage tote reservoir
- Multiple net pots (various sizes)
- Submersible water pump
- Timer for flood cycles
- EC/TDS meter
- Full-spectrum LED grow light
- Premium nutrient system
- Backup air pump
Estimated Cost: $250-$400
Advanced Production
Scale up to serious home production:
- Multi-channel NFT system
- Commercial-grade LED panels
- Dual reservoir setup
- Automatic dosing system
- Climate control equipment
- Advanced monitoring system
- Professional nutrients
- Backup power options
Estimated Cost: $800-$1,500
Nutrient Solutions
Hydroponic nutrients come in liquid or powder form, each with advantages. Liquid nutrients mix easily and dissolve completely, making them convenient for beginners. However, they’re heavier to ship and typically more expensive per use. Powder nutrients cost less and last longer in storage, but require more careful measuring and mixing.
Most hydroponic fertilizers come in two or three parts that you mix separately before adding to water. This separation prevents certain nutrients from binding together during storage. Part A typically contains calcium nitrate, while Part B contains other macro and micronutrients. Some formulas add a third part for micronutrients or bloom boosters.
Choose nutrients formulated specifically for hydroponics rather than using traditional garden fertilizers. Hydroponic formulas include all essential nutrients in proper proportions and dissolve completely in water without leaving residues that clog pumps and drip lines.
Best Plants for Hydroponic Growing
Not all plants thrive in hydroponic systems equally. Some crops adapt beautifully to water-based growing, producing impressive yields with minimal fuss, while others present challenges better left to experienced growers. Understanding which plants work best helps you start with confidence and early success.
Leafy Greens – The Perfect Starting Point
Lettuce ranks as the ideal first crop for hydroponic beginners. It grows quickly (harvest in 4-6 weeks), tolerates minor pH and nutrient fluctuations, and thrives in simple systems like deep water culture. Different lettuce varieties offer various flavors and textures, from crispy romaine to tender butterhead types. The nutrient solution for lettuce remains relatively straightforward, making it forgiving for newcomers still learning to manage their systems.

Spinach grows equally well hydroponically, offering high nutritional value and relatively quick maturity. Swiss chard provides colorful stems and nutritious leaves while tolerating slightly warmer conditions than other greens. Kale adapts well to hydroponics, though it grows slower than lettuce and needs more nutrients as it matures. These leafy crops share similar nutrient requirements, allowing you to grow them together in the same system.
Herbs – Fresh Flavor Year-Round
Culinary herbs represent another excellent choice for hydroponic gardens. Basil grows vigorously in hydroponic systems, often producing more flavorful leaves than soil-grown plants. Regular harvesting encourages bushy growth, providing continuous production. Cilantro grows quickly but prefers slightly cooler temperatures. Parsley establishes slowly from seed but produces steadily once mature.
Mint spreads aggressively even in hydroponic systems, making it perfect for dedicated containers. Its vigorous growth means you’ll never run short of fresh mint for cooking or beverages. Oregano, thyme, and other Mediterranean herbs also adapt to hydroponics, though they prefer slightly drier conditions than water-loving basil.
Easiest Herbs for Beginners:
- Basil (multiple varieties)
- Mint (contained separately)
- Cilantro (succession planting)
- Parsley (curly or flat)
- Chives (perennial production)
Fruiting Vegetables – Advanced but Rewarding
Once you’ve mastered growing leafy crops, tomatoes become the natural next challenge. Hydroponic tomatoes produce impressive yields—often 30-50% more than soil-grown plants—when given proper support and nutrients. Cherry and grape tomato varieties work especially well, producing abundant clusters of sweet fruit over several months. Larger beefsteak types need sturdy support systems and more space, but reward growers with huge, flavorful tomatoes.
Peppers adapt excellently to hydroponic growing, though they mature more slowly than tomatoes. Both sweet bell peppers and hot varieties thrive in water-based systems. Plants grow compact and productive, often producing for six months or more when conditions remain stable. Peppers tolerate slightly warmer temperatures than tomatoes, making them suitable for warmer indoor growing areas.
Cucumbers grow rapidly in hydroponic systems, especially European greenhouse varieties bred for protected cultivation. These plants require vertical support and regular pruning to manage their vigorous growth. Strawberries produce well hydroponically, offering the advantage of clean fruit that never touches soil. However, they need specific nutrient ratios and cooler temperatures during certain growth phases.
Plants to Avoid as a Beginner
Root vegetables like carrots, potatoes, and beets don’t adapt well to hydroponic systems. The edible portions develop underground in soil, and most hydroponic setups can’t accommodate proper root development for these crops. While some advanced growers successfully cultivate root vegetables in deep media beds, beginners should focus on above-ground crops initially.
Corn, squash, pumpkins, and other large, sprawling plants require more space and structural support than most home hydroponic systems provide. Their extensive root systems and heavy fruits present challenges even for experienced growers. Large fruiting plants like melons also need sophisticated support systems and careful nutrient management.
Plants requiring a dormant period or specific seasonal temperature changes—such as most fruit trees, garlic, and many bulbs—don’t suit typical hydroponic setups. These crops need conditions difficult to replicate in controlled environments without substantial equipment and experience.
“Start with lettuce and herbs to build your confidence and understanding. Once you can consistently grow perfect lettuce, you’ll have the skills to tackle more demanding crops like tomatoes. Success with simple plants teaches you system management without the complications of larger, longer-season crops.”
Step-by-Step Guide to Starting Your First System
Building and launching your first hydroponic garden feels exciting and perhaps a bit intimidating. Following a systematic approach reduces confusion and helps you avoid common beginner mistakes. This guide walks you through creating a simple deep water culture system perfect for lettuce or herbs—a foundation you can build upon as your skills develop.
Building a Basic DWC System
Start with a 5-gallon opaque bucket with a lid. Dark colors prevent light from reaching the nutrient solution, which inhibits algae growth. Drill or cut a hole in the lid sized to fit a 6-inch net pot snugly—the pot’s rim should rest on the lid while the bottom extends into the bucket. For multiple plants, use a larger storage tote and drill multiple holes spaced at least 6-8 inches apart.
Insert an air stone connected to an air pump through a small hole in the lid or run the airline under the lid’s edge. The air stone should sit near the bucket’s bottom, creating a stream of fine bubbles that oxygenate the entire solution. Choose an aquarium pump rated for at least your reservoir volume—a pump rated for 10 gallons works well for a 5-gallon bucket.

Fill the net pot with your chosen growing medium—clay pebbles work excellently for beginners. Rinse the medium thoroughly before use to remove dust and fine particles that could clog your system. The growing medium should fill the pot to within an inch of the rim, leaving space for the seedling.
Preparing Your Nutrient Solution
Start with clean water—tap water works for most locations unless you have very hard water or well water with high mineral content. Fill the bucket to within 2 inches of the lid, leaving air space above the water level. Let tap water sit for 24 hours if possible to allow chlorine to dissipate, or use dechlorinator drops from aquarium supply stores.
Mix your hydroponic nutrients according to package directions for the volume of water in your system. Most liquid nutrients require 5-10 ml per gallon for general-purpose leafy green formulas. Add nutrients to the water and stir thoroughly. Never add concentrated nutrients directly to the reservoir without diluting first, as this can create hot spots that damage plant roots.
Test the pH of your nutrient solution with a pH meter or test strips. Most hydroponic plants prefer a pH between 5.5 and 6.5, with leafy greens thriving around 5.8-6.2. Adjust pH using pH-up or pH-down solutions, adding small amounts and testing again until you reach the target range. Remember that a little adjustment solution goes a long way—add drops rather than splashes.
Initial pH Adjustment: New nutrient solutions often need pH adjustment after mixing. Add nutrients first, then test and adjust pH. The nutrients themselves affect pH, so always add and mix nutrients before making pH corrections. Retest pH after 24 hours as it may drift slightly as nutrients fully dissolve.
Transplanting Seedlings
Start seeds in small rockwool cubes, rapid rooter plugs, or even moistened paper towels until they germinate and develop their first true leaves. Once seedlings reach 2-3 inches tall with healthy root development, they’re ready to transplant into your hydroponic system.
Rinse away any soil or starting medium clinging to roots—soil particles can harbor bacteria and clog systems. Gently spread the roots and nestle the seedling into the growing medium in your net pot. Add more medium around the roots to hold the plant upright, but avoid compacting it too tightly. Roots need air spaces to grow and access oxygen.
Place the net pot in the lid hole with roots extending into the bucket. The water level should initially touch the bottom of the net pot, allowing the growing medium to wick up moisture while roots establish. As roots grow longer and reach the water, lower the water level to leave a 1-2 inch air gap between the water surface and the net pot bottom. This air gap provides essential oxygen to the root zone.
Setting Up Lighting
If growing indoors or in a location without strong natural light, position your grow light above the plants. LED grow lights should sit 6-12 inches above leafy greens and herbs initially. As plants mature and grow taller, adjust the light height to maintain consistent distance from the plant canopy.
Set a timer to provide 12-16 hours of light daily for most crops. Lettuce and herbs thrive with 14-16 hours, while fruiting crops like tomatoes prefer 16-18 hours during vegetative growth. Consistent light schedules help plants establish healthy growth rhythms and prevent stress from irregular lighting.

Daily and Weekly Maintenance
Check your system daily during the first week, looking for issues like wilting, yellowing leaves, or equipment malfunctions. This frequent monitoring helps you catch problems early when they’re easier to correct. After the first week, most stable systems need checking every 2-3 days.
Monitor water level and top off with fresh water as needed—plants consume water faster than nutrients, so the solution becomes more concentrated as water evaporates. Add plain water when topping off, not additional nutrients, to maintain proper nutrient strength. If your water is very hard or alkaline, use filtered or distilled water for top-offs.
Test pH every 2-3 days and adjust as needed to maintain the optimal range. pH tends to drift over time as plants absorb certain nutrients preferentially, changing the solution’s chemistry. Small adjustments made frequently keep pH more stable than large corrections made occasionally.
Every 2-3 weeks, completely change the nutrient solution. Dump the old solution (use it to water outdoor garden plants if possible), clean the reservoir with mild soap and water, rinse thoroughly, and refill with fresh nutrient solution. This prevents the buildup of unused salts and ensures plants always have access to all necessary nutrients in proper proportions.
Daily Checks
- Observe plant appearance and health
- Verify pumps are operating correctly
- Check water level in reservoir
- Ensure lights are functioning properly
- Look for signs of pests or disease
Every 2-3 Days
- Test and adjust pH levels
- Top off water as needed
- Check EC/TDS levels
- Remove any dead leaves
- Inspect roots for health
Weekly Tasks
- Clean any algae growth
- Inspect equipment for wear
- Prune plants as needed
- Adjust light height for growth
- Record system measurements
Every 2-3 Weeks
- Complete nutrient solution change
- Thoroughly clean reservoir
- Sanitize net pots if reusing
- Replace air stones if clogged
- Evaluate system performance
Complete Hydroponic Shopping Guide
Download our comprehensive buying guide with specific product recommendations, where to find the best deals, and what to avoid.
Maintenance and Troubleshooting Common Issues
Even well-designed hydroponic systems occasionally experience problems. Learning to recognize early warning signs and understanding their causes helps you respond quickly before small issues become major crop failures. Most problems stem from imbalanced pH, incorrect nutrient strength, inadequate oxygen, or equipment malfunctions.
Managing pH and Nutrient Levels
pH drift represents the most common challenge in hydroponic gardening. As plants absorb nutrients at different rates, the chemical composition of the solution changes, causing pH to rise or fall. Most solutions tend toward higher pH over time as plants preferentially absorb acidic nutrients. Check pH regularly and make small adjustments to keep it within the optimal 5.5-6.5 range.
If pH won’t stabilize despite repeated adjustments, check your water source quality. High alkalinity in source water constantly pushes pH upward, requiring frequent correction. Consider using filtered water or adding an acidic nutrient formula designed for hard water. Conversely, if pH drops rapidly, you might be overfeeding or need to change the nutrient solution more frequently.
Electrical conductivity (EC) readings help you monitor nutrient strength. Most leafy greens thrive at 1.2-2.0 EC, while fruiting crops prefer 2.0-3.5 EC. If EC rises above target levels, dilute the solution by adding plain water. If EC falls too low, add more nutrients or perform a complete solution change. Maintaining consistent EC prevents both nutrient deficiencies and toxicities.
| Symptom | Likely Cause | Solution | Prevention |
| Yellowing lower leaves | Nitrogen deficiency or natural aging | Increase nutrient strength; remove old leaves | Maintain proper EC levels; regular solution changes |
| Brown leaf tips and edges | Nutrient burn from too-strong solution | Dilute solution with plain water; flush system | Monitor EC closely; follow nutrient guidelines |
| Stunted growth, dark leaves | pH too low (below 5.0) | Add pH-up solution gradually until pH reaches 5.8-6.2 | Test pH every 2-3 days; use quality pH adjusters |
| Wilting despite adequate water | Root rot from low oxygen or high water temperature | Increase aeration; lower water temperature; trim dead roots | Ensure air pump runs continuously; keep water below 75°F |
| White/gray fuzzy growth on roots | Pythium (root rot) from warm water or poor oxygen | Treat with hydrogen peroxide; improve aeration; lower temperature | Maintain water below 70°F; ensure excellent oxygenation |
| Slow growth, pale green color | Insufficient light or nutrients | Increase light intensity/duration; check nutrient strength | Provide 14-16 hours quality light; maintain proper EC |
| Algae growth in reservoir | Light penetration into nutrient solution | Clean reservoir; ensure complete light blocking | Use opaque containers; cover all openings |
Preventing and Treating Root Problems
Healthy roots appear white or cream-colored with a slightly fuzzy texture from fine root hairs. Brown, slimy, or foul-smelling roots indicate root rot, usually caused by pythium fungus. This devastating condition spreads quickly in warm, oxygen-poor water, potentially killing plants within days.
Prevention proves far easier than treating established root rot. Keep water temperatures below 70°F (65-68°F is ideal) using chilled nutrient solution, frozen water bottles, or aquarium chillers for serious systems. Ensure excellent aeration—you should see steady streams of fine bubbles throughout the reservoir. Good oxygen levels inhibit anaerobic bacteria and fungi that cause root diseases.

If root rot appears, act immediately. Remove affected plants from the system to prevent spread. Trim away all brown, dead roots with sterilized scissors. Add hydrogen peroxide to the nutrient solution (3-5 ml of 3% hydrogen peroxide per gallon) to kill pathogens. Change the solution completely and clean the entire system thoroughly. Consider using beneficial bacteria products like hydroguard to colonize roots with protective microorganisms.
Dealing with Pests in Hydroponic Systems
Indoor hydroponic gardens experience fewer pest problems than outdoor gardens, but insects occasionally appear. Aphids, fungus gnats, thrips, and whiteflies can migrate indoors through open windows or hitchhike on plants brought from outside. Early detection through regular inspection prevents minor pest appearances from becoming infestations.
Check the undersides of leaves regularly for tiny insects or eggs. Yellow sticky traps hung near plants catch flying pests and alert you to their presence. Fungus gnats particularly love damp growing media, laying eggs that hatch into larvae feeding on roots and organic matter. Allow the top layer of growing medium to dry between watering cycles to discourage gnats.
Address pest problems immediately with targeted solutions. Insecticidal soap or neem oil sprays handle most soft-bodied insects like aphids and whiteflies safely for food crops. Apply treatments to leaf undersides where pests hide. For severe infestations, consider introducing beneficial insects like ladybugs or predatory mites that consume pest species without harming plants.
Equipment Troubleshooting
Pump failures represent the most serious equipment issue in active hydroponic systems. Test pumps weekly by listening for normal operation and checking output. Air pumps should produce steady bubbles, while water pumps should maintain consistent flow rates. Keep spare pumps on hand for critical systems—replacing a failed pump within hours can save an entire crop.
Clean or replace air stones every 4-6 weeks as mineral deposits clog their pores, reducing bubble production and oxygen transfer. Submerge used air stones in vinegar overnight to dissolve mineral buildup, then rinse thoroughly before reusing. Water pump intakes can clog with roots, media particles, or algae—inspect and clean them monthly.
Timer malfunctions can flood ebb and flow systems or leave nutrient film technique channels dry. Test timers monthly by manually observing complete on/off cycles. Battery backup timers prevent program loss during power outages. For critical systems, install redundant timers or use controllers with battery backup to ensure continuous operation.
Why are my plant leaves turning yellow?
Yellowing leaves have several potential causes in hydroponic systems. Lower leaves naturally yellow and die as plants mature—this is normal. However, widespread yellowing indicates nitrogen deficiency (increase nutrient strength), pH imbalance preventing nutrient uptake (test and adjust pH to 5.8-6.2), or insufficient light (increase intensity or duration). Yellow leaves with green veins suggest iron deficiency, usually from pH above 6.5 locking out iron availability.
How often should I change my nutrient solution?
Change nutrient solution completely every 2-3 weeks for most systems and crops. Short-cycle crops like lettuce may only need one change during their entire 6-week growing period, while long-season plants like tomatoes benefit from biweekly changes. More frequent changes become necessary if you notice pH becoming difficult to stabilize, EC levels fluctuating significantly, or algae growth despite precautions. Always change solution if plants show signs of nutrient deficiency despite proper EC readings—the solution may lack specific nutrients plants have depleted.
Can I use regular garden fertilizer in my hydroponic system?
Never use standard garden fertilizer in hydroponic systems. Regular fertilizers contain insoluble components that don’t fully dissolve in water, leading to sediment that clogs pumps and lines. They also lack the complete micronutrient profile hydroponic plants need since soil naturally provides some trace elements. Hydroponic fertilizers are specially formulated to dissolve completely and provide all essential macro and micronutrients in available forms. Using the wrong fertilizer will likely result in nutrient deficiencies and equipment problems.
What should I do if my hydroponic system loses power?
Power outages affect different systems differently. Deep water culture systems can survive 12-24 hours without air pumps if water stays cool. Nutrient film technique and aeroponic systems face immediate risk as roots dry out within 1-2 hours. When power fails, manually water NFT and aeroponic systems every 2-3 hours by pouring nutrient solution over roots. For DWC, agitate water periodically by hand or add hydrogen peroxide (5 ml of 3% solution per gallon) to provide temporary oxygen. Consider battery backup air pumps for critical systems.
How can I tell if my roots are healthy?
Healthy hydroponic roots appear white to cream-colored with a slightly fuzzy texture from abundant root hairs. They should smell fresh or have minimal odor. Roots actively growing exhibit white tips and branch frequently. Warning signs include brown or gray color, slimy texture, foul smell (indicates root rot), or very few root hairs. Red-tinged roots sometimes occur naturally in certain plant varieties and don’t indicate problems. Clear, rapid growth of new white roots shows your system provides optimal conditions.
Water Quality and Nutrient Management
The foundation of successful hydroponic gardening rests on water quality and proper nutrient management. Understanding your water source, how nutrients work, and maintaining optimal conditions separates thriving gardens from struggling ones. These factors directly impact plant health, growth rates, and final yields.
Understanding Your Water Source
Water quality varies significantly depending on your source. Municipal tap water typically contains chlorine or chloramine added for disinfection. Chlorine dissipates naturally if you let water sit for 24 hours, but chloramine persists and requires treatment with vitamin C (ascorbic acid) or activated carbon filtration. Most municipal water works fine for hydroponics after dechlorination, though very hard water may cause issues.
Well water presents different challenges. It often contains high levels of dissolved minerals like calcium, magnesium, and iron. While plants need these minerals, excessive amounts in your source water reduce your control over nutrient ratios. Test well water before using it for hydroponics—many county extension offices provide inexpensive water testing services. Hard water with high mineral content may require filtration or careful nutrient adjustments.
Reverse osmosis (RO) filtered water provides the cleanest slate for hydroponic growing. RO systems remove virtually all dissolved minerals, giving you complete control over nutrient composition. However, RO systems waste significant water during filtration and add equipment costs. Many successful hydroponic gardeners use tap water effectively by understanding its characteristics and adjusting their approach accordingly.
Water Quality Parameters:
- Total Dissolved Solids (TDS): Should be below 200 ppm before adding nutrients
- Hardness: Below 150 ppm calcium carbonate is ideal
- Chlorine: Should be removed or dissipated before use
- pH: Starting pH between 6.0-8.0 can be adjusted
- Temperature: Cool water (60-70°F) works best
Nutrient Solution Basics
Plants require 17 essential elements for healthy growth. Carbon, hydrogen, and oxygen come from air and water. The remaining 14 nutrients must be provided through the nutrient solution. Macronutrients (nitrogen, phosphorus, potassium, calcium, magnesium, sulfur) are needed in larger quantities, while micronutrients (iron, manganese, boron, zinc, copper, molybdenum, chlorine, nickel) are required in trace amounts.
Complete hydroponic fertilizers provide all these nutrients in balanced ratios. Different formulas serve different purposes—vegetative growth formulas contain more nitrogen for leaf development, while bloom formulas increase phosphorus and potassium for fruit production. Some nutrients react chemically when concentrated together, which is why many hydroponic fertilizers come in multiple parts that you mix separately.
Mixing and Managing Nutrients
Always follow manufacturer instructions for mixing hydroponic nutrients. Start with room-temperature water in your reservoir, then add nutrients gradually while stirring. If using multi-part formulas, add each part separately and mix thoroughly before adding the next. Never combine concentrated nutrient solutions directly—this can cause chemical reactions that precipitate nutrients out of solution.
After mixing nutrients, let the solution sit for 30 minutes before testing pH. Nutrients affect water chemistry, so pH readings taken immediately after mixing may not reflect the final pH. Once pH stabilizes, adjust it to your target range using pH-up or pH-down solutions designed for hydroponics.

Check both pH and EC every 2-3 days as plants consume nutrients at different rates, changing the solution’s composition. Top off with plain water when levels drop from evaporation and plant uptake—adding more nutrients during top-offs will push EC too high. Only add nutrients if EC testing shows levels have dropped below the target range for your crops.
Nutrient Deficiency Recognition
Plants communicate nutrient needs through their appearance. Learning to recognize deficiency symptoms helps you adjust feeding before problems become severe. Mobile nutrients (nitrogen, phosphorus, potassium, magnesium) show deficiency symptoms on older leaves first as plants reallocate these nutrients to new growth. Immobile nutrients (calcium, iron, sulfur, most micronutrients) show problems on new growth since plants can’t move them from old leaves.
Nitrogen deficiency causes uniform yellowing of lower leaves, progressing upward if not corrected. Phosphorus deficiency creates dark, purplish leaves, especially on leaf undersides. Potassium deficiency shows as yellowing and browning of leaf margins, starting with older leaves. Calcium deficiency affects new growth, causing distorted leaves and tip burn in lettuce.
Iron deficiency, common when pH rises above 6.5, creates yellowing between leaf veins while veins remain green (called interveinal chlorosis). Magnesium deficiency produces similar interveinal yellowing but starts on lower leaves. Many apparent nutrient deficiencies actually stem from pH imbalance preventing nutrient uptake rather than actual shortages in the solution.
The pH Connection: Before increasing nutrient strength to address deficiency symptoms, always check pH first. A pH outside the 5.5-6.5 range can lock out specific nutrients even when they’re present in adequate amounts. Correcting pH often resolves apparent deficiencies without any nutrient adjustments. This is why maintaining proper pH matters more than any other single factor in hydroponic success.
Organic vs. Synthetic Nutrients
Most hydroponic nutrients are synthetic, derived from mineral salts. These dissolve completely in water, provide immediately available nutrition, and work reliably in all system types. Synthetic nutrients give precise control over nutrient ratios and don’t introduce organic matter that can clog systems or promote bacterial growth.
Organic hydroponic nutrients, derived from plant and animal sources, appeal to gardeners seeking organic production. However, organic nutrients present challenges in hydroponic systems. They don’t dissolve as completely as synthetic nutrients, may clog drip lines and pumps, and can promote bacterial growth in reservoirs. The organic matter they contain also makes pH management more difficult.
If you choose organic nutrients for hydroponic growing, expect more frequent cleaning and maintenance. Monitor systems carefully for clogs and adjust pH more frequently. Some growers successfully use diluted fish emulsion or other organic solutions, but these work best in simple systems like the Kratky method rather than recirculating systems with pumps and fine tubing.
Cost Analysis and Budget Planning
Understanding the true costs of hydroponic gardening helps you make informed decisions about system size, type, and whether hydroponics makes financial sense for your situation. While initial investments exceed traditional gardening, ongoing costs remain low and higher yields often provide quick payback.
Initial Setup Costs
Your first hydroponic system represents the largest expense. Budget systems built with recycled materials and basic equipment start around $50-$75 for a small lettuce setup. Mid-range systems with quality components and proper monitoring equipment typically cost $150-$300. Premium systems with advanced features, multiple growing stations, and professional-grade equipment can exceed $1,000.
Consider what you’re trying to accomplish when budgeting. Growing fresh herbs and salad greens for your family requires minimal investment—a $75 system produces impressive results. Serious vegetable production to offset grocery costs justifies spending more for larger capacity and better equipment. Commercial-scale operations need professional systems with automation and monitoring.
| System Type | Initial Cost | Monthly Operating Cost | Annual Yield Value | Payback Period |
| Simple Kratky (2-4 plants) | $25-$50 | $5-$10 | $200-$300 | 1-2 months |
| Basic DWC (6-8 plants) | $75-$150 | $15-$25 | $400-$600 | 2-4 months |
| NFT Channel System (12-16 plants) | $200-$350 | $25-$40 | $800-$1,200 | 3-5 months |
| Dutch Bucket (8 fruiting plants) | $300-$500 | $35-$60 | $1,200-$1,800 | 4-6 months |
| Large Ebb and Flow (20+ plants) | $500-$800 | $50-$80 | $1,800-$2,500 | 5-8 months |
Ongoing Operating Costs
Electricity for pumps and lighting represents the primary ongoing expense. Air pumps and small water pumps consume minimal power—typically 3-15 watts continuously. LED grow lights use more electricity, though modern LEDs remain efficient compared to older technologies. A typical 50-watt LED fixture running 16 hours daily costs approximately $5-8 monthly, depending on local electricity rates.
Nutrients and pH adjusters cost $10-30 monthly for small home systems. Buying larger quantities reduces per-unit costs significantly. A liter of liquid nutrients lasts several months for a small system, while fruiting crops in larger setups consume nutrients faster. pH adjustment solutions last a long time—most growers spend less than $5 monthly on pH products.
Water costs remain negligible for hydroponic systems. While you’ll use water for initial fills and periodic changes, hydroponics uses 90% less water than soil gardening overall. Even large systems add only a few dollars to monthly water bills. Other consumables like growing media and replacement parts factor into costs occasionally but don’t represent major ongoing expenses.
Comparing Costs to Benefits
Calculate the value of your hydroponic production by comparing grocery store prices for the same produce. Organic lettuce costs $3-5 per head retail, while hydroponic systems produce lettuce for approximately $0.50-1.00 per head including nutrients and electricity. Fresh basil costs $3-5 per small package at stores but grows continuously in hydroponic systems for pennies per harvest.
Tomatoes provide even more impressive savings. A productive hydroponic tomato plant yields 20-30 pounds over a growing season. At $3-4 per pound for quality tomatoes, one plant produces $60-120 worth of fruit. With eight tomato plants in a Dutch bucket system costing $400 to establish, you’ll recover your investment in the first season while enjoying superior freshness and flavor.

Beyond direct cost savings, consider intangible benefits: year-round production regardless of weather, knowing exactly what inputs went into your food, zero pesticides, maximum freshness, and the satisfaction of growing your own food. Many hydroponic gardeners find these factors justify their investment even if direct cost savings prove modest.
Smart Spending Strategy: Start with an inexpensive system to learn fundamentals and determine if hydroponics suits you. Once you’ve successfully grown a few crops and understand system management, invest in better equipment and larger capacity. This progressive approach prevents spending heavily on a hobby you might not enjoy while building skills with forgiving, low-cost systems.
Scaling Up and Advanced Techniques
After mastering basic hydroponic systems and growing comfortable with daily management, you might want to expand your operation or try more sophisticated techniques. Scaling up successfully requires planning, understanding the challenges of larger systems, and knowing which advanced methods suit your goals and available resources.
Expanding Your Growing Capacity
The modular nature of hydroponic systems makes expansion straightforward. Add more containers to DWC setups, extend NFT channels, or build additional Dutch buckets to increase plant capacity without completely redesigning your system. However, larger systems introduce new considerations.
Multiple reservoirs require more monitoring time and organization. Consider consolidating smaller systems into fewer, larger reservoirs that recirculate through multiple growing areas. This centralized approach lets you manage pH and nutrients in one location rather than maintaining several separate reservoirs. Install valves to isolate different growing areas for cleaning or troubleshooting without affecting the entire system.
Larger volumes of nutrient solution provide more stability—pH and EC fluctuate less dramatically in 50-gallon systems than in 5-gallon buckets. However, solution changes become more labor-intensive and expensive. Many growers with large systems perform partial water changes, replacing 25-50% of the solution weekly rather than complete changes every few weeks.
Automation and Monitoring Technology
As systems grow more complex, automation reduces workload and improves consistency. Simple timers for pumps and lights represent basic automation available in any system. More advanced controllers automate pH adjustment, nutrient dosing, and environmental monitoring.
Automatic pH controllers continuously monitor pH and inject small amounts of adjustment solution to maintain target levels. These systems eliminate daily pH testing and adjustment, especially valuable in larger operations. Similarly, automated nutrient dosers maintain optimal EC levels by adding concentrated nutrients as plants consume them from the solution.
Environmental controllers manage temperature, humidity, and CO2 levels in enclosed growing spaces. These sophisticated systems activate heating, cooling, ventilation, and supplemental CO2 based on your programmed parameters. While expensive, environmental control dramatically improves plant growth in serious indoor operations.
Smart monitoring systems with smartphone connectivity let you track system parameters remotely. Receive alerts if pH drifts out of range, water levels drop too low, or temperatures become problematic. These systems provide peace of mind when you’re away from home and detailed data logging to optimize your growing protocols.
Vertical Growing Systems
Vertical hydroponic systems maximize production in limited floor space by stacking growing levels. Tower systems grow plants in vertical columns with nutrient solution dripping from top to bottom. These systems work excellently for strawberries, lettuce, and herbs while occupying minimal floor space.
Vertical NFT systems stack multiple channels on shelving units, each with its own nutrient delivery and drainage. This approach lets you grow different crops with varying nutrient requirements on different levels. Commercial operations use sophisticated vertical systems to produce massive quantities of leafy greens in warehouse environments.
Consider structural requirements when planning vertical systems. Weight adds up quickly—a gallon of water weighs 8.3 pounds, plus growing media, plants, and equipment. Ensure shelving and support structures handle the total weight safely. Vertical systems also need proper lighting at each level, increasing electricity costs and complexity.
Aquaponics Integration
Aquaponics combines fish farming with hydroponic growing in a symbiotic system. Fish waste provides nutrients for plants, while plants filter water for fish. This integrated approach appeals to gardeners interested in sustainable food production and raising protein alongside vegetables.
Aquaponic systems require additional knowledge about fish care, water chemistry, and the nitrogen cycle. You’ll maintain appropriate fish populations, feed them regularly, and monitor ammonia, nitrite, and nitrate levels to ensure both fish and plant health. The system takes 4-6 weeks to establish beneficial bacteria that convert fish waste into plant-available nutrients.
Benefits include reduced fertilizer costs (fish waste provides most nutrients) and the opportunity to harvest both vegetables and fish. However, aquaponic systems face constraints—you can’t use many pesticides or treatments that might harm fish, and system pH must balance fish and plant needs. Most beginners should master standard hydroponics before attempting aquaponics.
Ready to Take Your Growing to the Next Level?
Join our 7-day email course on advanced hydroponic techniques and learn how to maximize yields, automate systems, and troubleshoot like a pro.
Starting Your Hydroponic Journey
Hydroponic gardening opens new possibilities for growing fresh, healthy food regardless of your living situation, outdoor space limitations, or local climate. What might have seemed complicated and intimidating at first becomes manageable when you understand the basic principles and start with appropriate systems for your experience level.
Begin your hydroponic journey with realistic expectations and a willingness to learn from both successes and setbacks. Choose a simple system like deep water culture for your first attempt, focusing on easy crops like lettuce or basil. Master the fundamentals of pH management, nutrient mixing, and system maintenance before expanding to more complex setups or challenging crops.
Remember that every experienced hydroponic gardener started exactly where you are now—curious about the possibilities but uncertain about the details. The learning curve exists, but it’s not steep. Within weeks of starting your first system, you’ll develop the skills and confidence to expand your growing operation, experiment with different crops, and enjoy the satisfaction of harvesting fresh produce you’ve grown in water.
The investment in time and equipment pays dividends through year-round harvests, superior quality produce, and the fascinating process of optimizing growing conditions for maximum yields. Whether you maintain a small herb garden on your kitchen counter or develop an extensive indoor vegetable production system, hydroponic gardening provides a rewarding, sustainable way to grow your own food.
Take that first step today—gather the basic supplies, build your first system, and plant your first seeds. You’ll soon discover why thousands of home gardeners are embracing hydroponic growing as their preferred method for producing fresh, flavorful vegetables and herbs throughout the year.